Your greenhouse frame is built to last. A well-made galvanized steel structure will still be standing and functional 20, 25, even 30 years down the line. The polythene cover stretched over that frame? That’s a different story. It requires a polytunnel plastic replacement much sooner.
The polythene cover works hard every single day, and it has a finite working life. Polytunnel plastic replacement is not a problem or a failure; it’s a planned part of owning a greenhouse, as routine as re-covering a roof or replacing worn tires.
What you want to avoid is replacing it in a crisis, such as mid-season, after a storm, with crops inside that can’t afford to be exposed.
This write-up walks you through how to handle polytunnel plastic replacement the right way.
How Long Should Your Polytunnel Cover Actually Last?
In Kenya’s conditions, a properly specified 200-micron UV-stabilized polythene cover has a working life of three to five years. With attentive maintenance, five to six years is achievable.
Some covers do reach seven or eight years, but at that point the UV stabilizers in the film have done most of their work, and the film is living on borrowed time.
The equatorial UV intensity that Kenya experiences is more aggressive than the conditions polythene covers face in Europe or temperate climates, where quoted lifespans of seven to ten years are common.
Don’t apply those figures to a Kenyan greenhouse. The replacement cycle here is shorter, and budgeting for it as a regular cost is simply realistic planning.
The Signs That Replacement Is Due
Waiting for the cover to tear before replacing it is the wrong approach. A greenhouse polythene cover that has reached the end of its useful life will tell you clearly; the trick is knowing how to read the signs before they become a crisis.
Visible yellowing or browning. Fresh polythene is milky-white or clear with good light transmission. As UV stabilizers are exhausted and the film begins breaking down, it yellows, browns, or turns opaque.
This discoloration is not just cosmetic. It signals that the film’s ability to transmit light efficiently has declined, which directly affects crop performance. Less light reaching your crops means lower yields, even if the structure still looks intact from the outside.
Brittleness when flexed. There is a simple way to determine this. Pick up a corner of the cover and flex it gently. If the polythene is healthy, it will stretch and return to shape. However, if it is stiff and brittle, cracking rather than flexing when stretched, it is approaching the end of its life.
Brittle film tears at the slightest stress. A branch catching in the wind, a cane brushing against it from inside, or someone leaning on it during maintenance could cause an irreparable tear. Once brittleness sets in, new tears will keep appearing until full replacement happens.
Loss of clarity and haze. Here’s a quick test you could run: hold a section of the film up to the light. A cover with good life remaining transmits light clearly. One that’s degraded will look milky, hazy, or translucent rather than transparent.
Light transmission drops significantly as the film degrades, sometimes by 20 to 30% compared to when it was new.
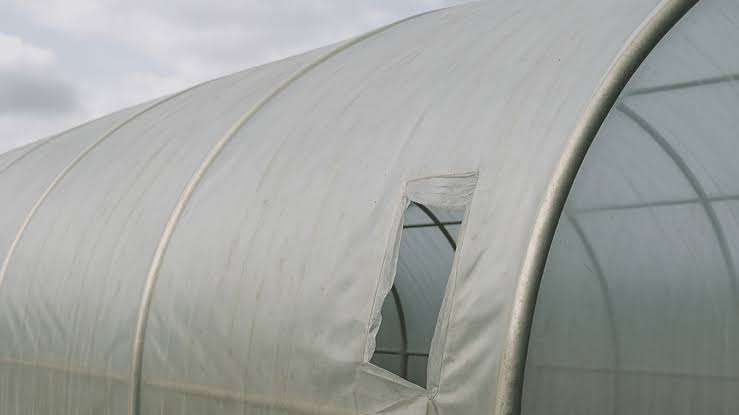
Recurring tears and patch failures. If you’re applying repair tape to the same structure repeatedly, and new tears keep appearing near old repair sites or along the film edges, the cover has reached the point where patching is simply postponing the inevitable.
The cover feels slack and won’t hold tension. Polythene film loses elasticity as it ages. A cover that can no longer be tensioned properly across the frame will flap in wind, causing abrasive wear at every contact point with the frame.
When to Schedule the Replacement
Timing the polytunnel plastic replacement correctly is crucial. The worst time to replace a cover is mid-season with a standing crop inside, or during a storm, or during the peak heat of the day.
Plan the replacement for between cropping cycles, when the greenhouse interior is clear. In Kenya, the transition between the short rains (November) and the onset of the dry season (December to January) gives you a reasonable window.
Equally, the gap between the long rains and the hot dry period from June onward offers another opportunity.
Do your polytunnel plastic replacement on a calm, overcast morning. Heat is the enemy of polythene installation, as hot panels expand and polythene that’s been stretched onto a warm frame contracts when temperatures drop at night, pulling at fixing points.
A cool morning gives the film more natural slack to work with during installation, and it tightens correctly as the day warms up.
Preparing The Frame for Polytunnel Plastic Replacement
Before the replacement polytunnel cover goes on, inspect and prepare the frame. This is the moment to catch problems that would otherwise be hidden under the new cover.
Check every horizontal and diagonal member for rust. Where the galvanized coating has been scratched or abraded, apply a zinc-rich cold galvanizing spray to the exposed areas. Left untreated, these are the points where corrosion will start.
Further, apply anti-hot-spot tape along the top of every hoop at the point where the polythene rests on the steel. As you may know, metal can get pretty hot under the sun. Leaving the hot steel exposed to come in contact with the underside of the polythene means it will accelerate localized degradation of the cover.
The Replacement Process
Removing the old polytunnel covering is straightforward but physically demanding. Have at least two people available.
Start by releasing the film from its fixings along both base edges, then work along the length from one end to the other, releasing securing channels or ties. Roll the old film up as you go rather than allowing it to pile up on the ground.
Installing the replacement polytunnel cover follows the reverse sequence. Position the new film so it can be pulled over the frame from one end, with enough material on each side to reach the base anchoring points.
Pull it firmly along the length of the structure to remove any lengthwise slack before tensioning it transversely and fixing it at the base.
The film needs to be taut. Loose polythene is not just a minor cosmetic issue; it flaps in wind, abrades against the frame, tears at fixing points, and fails years earlier than a correctly tensioned cover would. Once the base edges are fixed, verify that there are no puckers or loose sections across the roof before considering the job complete.
With a clean frame, anti-hot-spot tape in place, and the new cover correctly tensioned and fixed, your greenhouse is ready for another four to six years of productive use.
Original Reliable Greenhouses in Nairobi, Kenya at Irrihub Ke, +254 112 148 880
If you are looking to buy reliable, high-quality greenhouses in Kenya, Irrihub has some nice offers you may consider. We sell greenhouses and other growing solutions as independent units or as complete solutions (kits). The complete greenhouse solutions include:
- A galvanized steel structure
- 200-micron polythene cover (clear or yellow)
- Zig-zag fastening wires to hold the cover against the wind
- Roll up side ventilation with white insect net
- Entry porch
- Full drip irrigation system
- Water tank (size depends on greenhouse tier)
- 2-year warranty on structure and materials
- Optional crop support structure for climbing crops